Quick round up of the end of 2016!

The months have just got away from me and blogging has sadly been what has suffered most!

I thought I’d do a quick catch up of the end of the year and then try to carry on in a more regular manner with my posts!

Summer

Mum spent most of the summer with us so it was pretty busy with lots of visitors around. She headed off via the UK mid September and Rémy and I went across with her so we could catch up with the family and see Dad.

I never posted pics of my 40.5th birthday party in early August – was a great weekend with friends and family from all over the world (mum came from Oz, god-mother and her husband from the UK). I really enjoyed the planning and the night! I may make it a yearly thing to have a big summer garden party – so much fun!

Autumn

I love Autumn – the colours just get me! I wanted to take a picture of the amazing colours on the way to Bergerac (we are now picking Josh and another boy up there every afternoon as he has started Lycée (senior high) there) but sadly the night before I was planning on taking my camera and stopping to take photos there was a big wind storm and all the leaves came down! I will make sure I get some this year!

The Hazelnut crop was fantastic after a very poor crop the year before!

Very sadly my lovely Dad passed away in early October. I am eternally grateful that I went over and saw him less than 2 weeks before he went into hospital. RIP Dad xx

2 of my gorgeous boys!

Winter

We finally got Rémy a créche place in November so the weeks flew by as we have had lots of settling in sessions and I have a 10km drive each way so I spend much of my day in the car it feels like! It has been hard going as he isn’t keen on being away from me but we have now settled on a 4 mornings a week routine and we’ll see if we can get a longer day at some point if he can cope with it.

There was one seriously excited little boy this Christmas – he just loved it and has only stopped singing ‘Jingle Bells’ the last week or so!

Louis almost as excited!

I hope you all had a lovely Christmas and a Happy (belated) New Year to all xx

We’ve been adopted!

A few weeks ago we had a lovely black and white cat start hanging about. He was really sweet so after some discussion (read begging from Louis!) we decided if he didn’t have a home that we would keep him. I texted all the neighbours and found out he had shown up earlier in the summer and stayed for a while at one of our friends and that they couldn’t keep him but were sure he was homeless. Off we went to buy some food, a collar and some flea treatment. Louis has been fantastic and is looking after him really well while Remy has been fairly gentle with him so far! He has fitted nicely into the family and we have called him Oscar! How could we have resisted this face:

Medieval costumes and fun!

Wow how has it been a month since I posted – it has just flown by in a flurry of intense activity!

At the end of July our village had a weekend medieval festival in the village with everyone (well not everyone but lots of people!) dressing up for the festivities. I had read about it on the village website months ago and spent quite a lot of time researching all things medieval (so fascinating) and decided I was going to make our costumes, including a 12th century bliaut for myself! Needless to say much of the 2nd half of July was spent madly sewing, I got my hem finished at 6.30 pm the evening of the start of the festival! I would have loved to have added more detailing / trim to mine and even to hubby’s and Josh’s but alas ran out of time and was just happy to have them finished! We managed a quick photo shoot between the hem being sewn and going out, handily the centre part of our house includes a medieval building and staircase. I was pretty pleased with the results!

The shield on Remy’s tunic is the Irish version of our sirname – too cute!

Image

Louis’ chainmail was kindly knitted by my mother-in-law and looked pretty cool!

Image

One of the troupe of ‘medieval’ people (they go around festivals all over France all summer!) congratulated me on the correctness of Josh’s costume with the big central slits. Would have loved to have had more time for details like a proper non-modern belt and embroidery or ribbon around the edges.

Image

Image

Image

My costume was a much researched 12th century bliaut. I’ll do a post later when things calm down a bit detailing how I made it and the resources I used for anyone who is interested!

Image

Image

Image

Image

Image

Image

Ta Da the house!

I have just realised after looking back through my blog posts that while there are lots of garden and children photos I haven’t actually posted any pictures of the house! So to remedy that here we go with some from the front!

This is the northern end where we live:

The big French doors go into what is currently an unconverted double height entry with the far left end downstairs being the kitchen / living, the wall separating these two areas will be knocked down to make a huge open space. There will be a new floor put in above where the French doors are to make another bedroom. Above the kitchen / living is a huge room which the boys currently share (this will be split in two as it is 30m2 so plenty of room). The lintel that you can just see behind the car is the window the the office / guestroom that is half renovated that I posted about a little while ago and the room above that is currently our bedroom and was renovated by the previous owners, we have replaced the window with double glazing but not much else needs doing (until we split it to make the new upstairs bathroom that is!). So once the boys room is split and the new room above the entry done we’ll have 5 rooms (bed or study) with four upstairs and one downstairs, downstairs shower room, upstairs bathroom (we have recently managed to find a stunning old cast iron bath tub that will be going in!) and big living space / kitchen in this section of the house.

This central section of the building is what we think would have been the original building (there are exterior windows giving onto the big barn) and the stone stairs at the front and some other details like the stone sink suggest a very old building (14th or15th C perhaps – I need to do more research). This area is totally unrenovated at present but the plan is to make the room through the door at the bottom of the stairs into a big kitchen (giving out onto the garden on the other side of the building) with a bedroom above and a small mezzanine (child’s bedroom / study) over that. The small room under the stairs is currently where we keep the bins / bikes etc but may possibly end up having our boiler in it as well and above will be the ensuite giving onto the master bedroom.

This is what we call the big barn and little barn (they are a bit separated inside by the old cow feeders). It is a bit hard to get the full impression of just how big the big barn doors are – the smaller door is around normal door height (but much wider) and I think normal person height is about where the wood line is on the door! These are currently used as storage / workspace but there is massive potential!

The photos I did of the back the other day when I took these didn’t work out because of the sun so I’ll redo them and post again soon!

Peas!

The peas were my first thing to really grow and produce and they were oh so yummy!

This is how they were looking when they first started producing in early June:

Sadly by last week I had to pull them out as they were covered in powdery mildew and really past it! I have learnt some lessons though – they really do mean it when they tell you to thin them – I’m sure I had them too close which made my powdery mildew worse and harder to treat (I tried the natural milk method and copper but did it too late I think). The very wet spring I don’t think helped either then I think I may not have given them enough water over the last month where we have had nearly no rain. Ahh well we live and learn and I was still really pleased with what we did get.

We had my lovely friend Emily and her family visit from Oz a couple of weeks ago – it was so lovely to see them and Em took the time to get Remy to eat peas from the pod (I’m sure if I’d tried he’d have refused!!). Ever since then at least twice a day he yells ‘peeeeaas’ and either goes and picks some or if he can’t reach any drags one of us down the garden to get him some. It is so cute!

He snaps them in half then somehow picks them out one by one and says ‘mmmmm’ very loudly for each one he eats!

I think the last (according to Louis – I’ll have to go and check) were picked yesterday so I’m hoping the beans will soon be ready and he’ll love them as much!

Chicken and courgetti with lardons, garlic, shallots and lime.

So after months (years?) of reading about spiralizing veggies and a year or more of carefully cutting my zucchinis into tiny slices I finally bought myself a spiralizer! I was totally inspired to by the gorgeous zucchinis I’m growing in my garden.

I’m so pleased I did, I’ve used it so many times already – the taste and texture of just picked courgetti is just amazing! I’m starting to experiment with what I can do with it to make healthy, quick, yummy meals.This is what I came up with for the first two picked from my garden:

Pan fried chicken and courgetti with lardons, garlic, shallots and lime.

Ingredients:

  • 100-150 grams of chicken breast per person
  • 1-2 courgettes / zucchinis (depending where you come from and how big they are!) per person
  • 50 grams of lardons (chopped streaky bacon) per person
  • Garlic and shallots (eshallots) finely cut – I used 2 cloves of garlic and 2 shallots for 2 people but just adjust to your taste. You can also use onion if you don’t have shallots
  • Parmesan and freshly ground black pepper to finish

Method:

  1. Fry your lardons, garlic and shallots in a non stick pan until cooked and just starting to brown
  2. Remove from the pan and set aside (or push to the side of your pan)
  3. Add the chicken breasts and cook then remove from pan
  4. Mix in the courgetti with the lardons, garlic and shallots and squeeze the juice of 1/2 a lime over it all
  5. Place a lid over the pan allowing the courgetti to cook until just al dente
  6. Serve into bowls and top with the chicken – I also added an extra squeeze of lime onto the chicken
  7. Sprinkle some freshly grated parmesan and black pepper to serve
  8. Enjoy your delicious low carb dinner!

I’m so glad I used the lime – it really freshened the whole meal making it a fantastic summer dish!

June 2016 veggie patch!

The garden is coming along really well and we’ve had lots of rain through the early part of June followed by some heat so everything is growing nicely!

Early June saw a big push to get  filled all places in the EL veggie patch (get it – shaped like an E then an L – ha ha) we now have 3 corguettes, 2 chillis, 2 cucumbers, 14 tomatoes, 1 cherry tomato, various lettuces, carrots (well about 6 of them), radishes, peas, snow peas, broccoli, cauliflower, Brussels sprouts, 100 onions, shallots, dead garlic (have given up all hope – accidentally dug one up and it was rotten ), strawberries and raspberries. Not a great pic in the harsh afternoon light but you get the idea.

Image

The hubby rotovated a further 2.5 x 10 metre bit on the next terrace up – the back is going to be a pumpkin patch (2 large unknown variety, 4 small unknown (Aussie variety I got from organic farmer and kept seeds) and as many butternut as I can fit. I got the 2 big ones in up the back – I thought I read do an 18 inch hill so made it big t (not 18 but pretty big) then read somewhere else 3 inches
Image

The front section is 2 beds a metre wide each and 4 m long with a path – OK it is a trench – didn’t mean to do it that deep but after I’d made my last paths I’d read you should put the soil from the paths you make onto the beds – I perhaps overdid it. Louis commented it looks like WW1!

Image
Plan to cardboard the bottom of the path for weeds then probably just put some straw for the moment and get something on the sides to hold back the soil and in effect make raised beds! Plan to have lots of basil and beans in this section.

By the end of the month this is how it was looking:

The zucchinis (courgettes) are growing really well, already had 6 lovely ones from one plant. I think I need to be a bit more careful with my watering in the heat though as there have been a few little ones that have kind of shriveled up, turned brown and died (unless there is some other unknown thing going on and if so please tell me!).

http://my.clothnappytree.com/3/640/557526ce1cf7e4314f78ec4cae8d950b.jpg?1468146766

The pumpkin patch (need to sort out the weeds – I regret not mulching straight away, it makes the most enormous difference!).

The other end has the beans which are coming u nicely – they are so big no in comparison – amazing how much growth happens in just 10 days!

http://my.clothnappytree.com/3/640/bd4a620790f30f992051f828ed83be3e.jpg?1468146766

So we are eating lots of yummy fresh produce – mainly lettuce, radishes, courgettes, peas and the odd strawberry and some gooseberries.

Looking forward to tasting the rest!

Garden part IV – spring 2016 veggie patch

Back in early March I started my plans and work on the veggie garden. The original plan I was working to looked like this:

Image

Louis and I spent ages measuring and laying it all out:
Image
Image
Image
Image
Image
Image
Image

In the end hubby explained that it wouldn’t work to try to get all the little paths with the rotovator so we ended up just rotovating the whole thing and then I formed my paths later. The end result was a bit different from my drawing – it is basically a ‘L’ then a ‘E’. The paths are a bit messy looking but I need to re-cardboard them and I have just bought some wood chips to put on them so that should look much better!

By early May it was looking like this – lots of seeds in and small plants but not an awful lot to see!

Image
Peas and snow peas (mangetoute) running the 2 lines under the teeppee thing (obviously not needed yet for growth but I’m needing to build all sorts of Rémy barriers) and the shallots / eshallots doing really well next to them.
Image

By mid-May more wsa starting to grow and I kept on with my plantings:

The lettuce patch – the ones at the back are still my winter ones I planted in October then cos at the front:
Image
This first section has radish and carrots to the right then the non growing garlic through the centre then on the left is some more peas (need to put up a support). The top left is a small cherry tomato, some peppers, aubergine and perhaps something else that I can’t remember then heading off along the top row is all the tomatoes with a row of basil right a long the top edge:
Image
The pea house and I’ve done a little bed on the end with some nasturtiums (must get some on the other ends as well):
Image
The brassica area, I’ve got 6 cauliflowers at the front then some brussel sprouts,there is now also 6 broccolis in as well then along the top edge are 3 zuchinnis and there should have been a cucumber as well but I killed it (decapitated it as I picked it up  ). Then on the right hand of the L bit there are 6 strawberries and 2 raspberries (I haven’t managed to move them and decided I’ll leave them this year, I think I could cause more damage than good to move them now):
Image
Looking down the long edge of the ‘E’ where I have the tomatoes and a few lettuce in the centre (trying inter planting)
Image

We had a very wet spring so everything has grown really well – I’m so impressed with my first effort! I’m actually amazed looking back at these pics just how far it has come along!

Office / Guestroom renovation – part 2

Sorry I meant to put up the second part of this just after the first but got distracted by a quick trip to the UK to visit the family,  enjoying my mother in laws visit and not enjoying a non sleeping 18 month old!

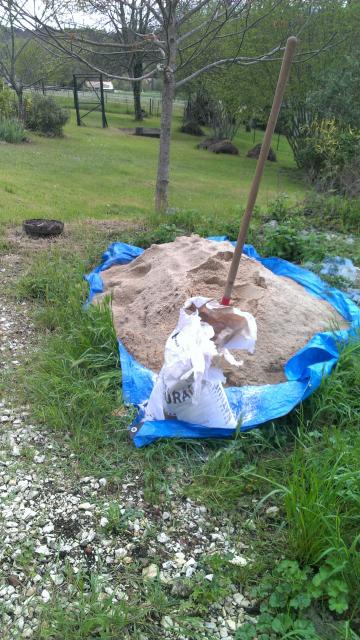
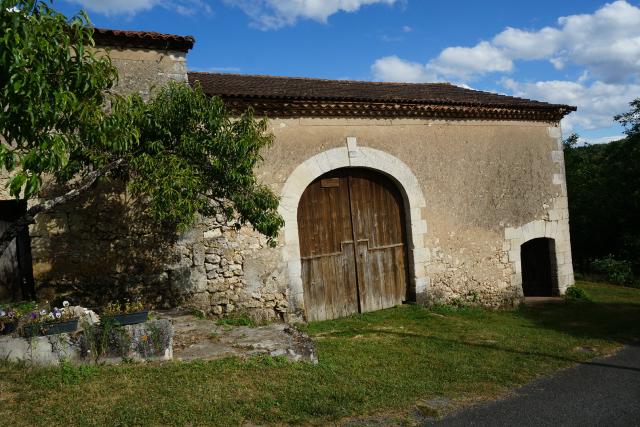
As I mentioned in the last post we are trying to use traditional / natural building products where we can so the next step was getting the lime render mixed up and on the walls for the first coat (called in French the most fantastic word – gobbité ).

Image

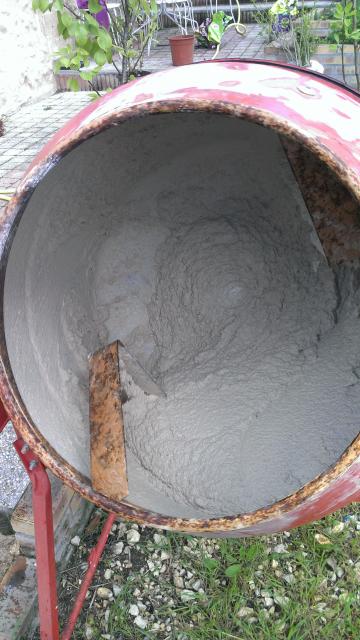
First load mixing – love the natural creme colour that lime gives:

Image

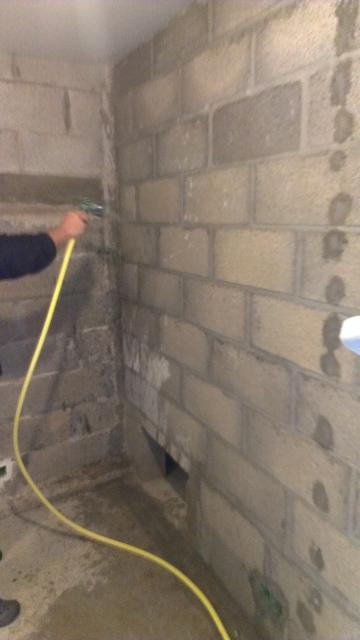
While I was mixing hubby was wetting down the walls:

Image

This was my first effort at rendering – my excitement knew no bounds – it was covering the horrid grey breezeblocks – and it was actually staying on the wall!

Image

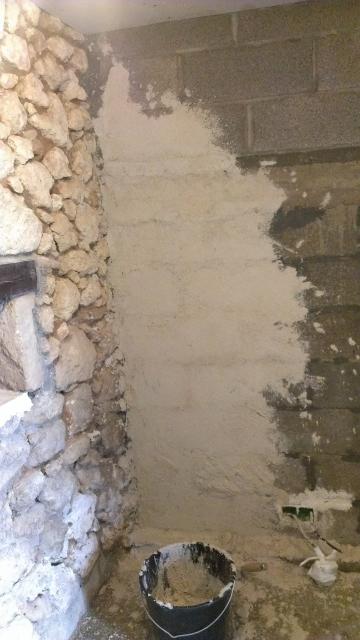
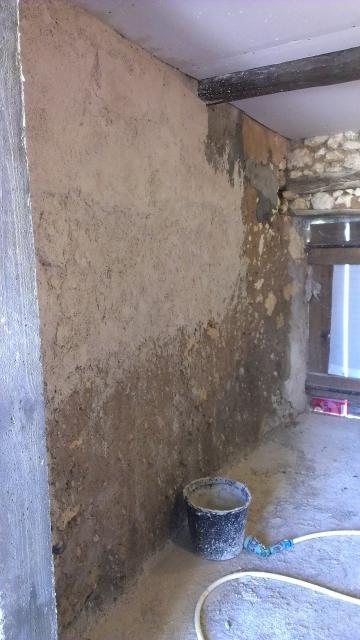
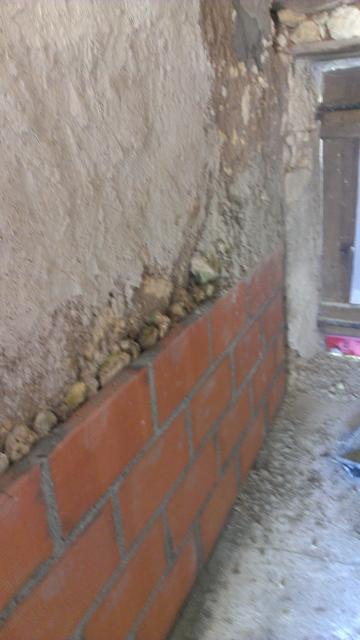
The two breezeblock walls with the first layer finished:

Image

Image

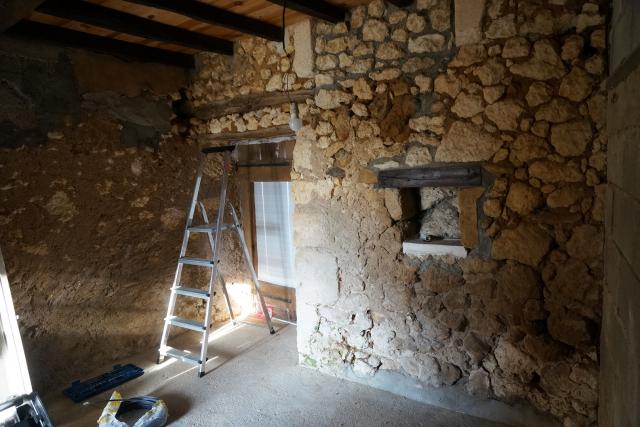
The very rough wall is having a terracotta wall built at the bottom and there is a lot of building up to do so we gave it a good start but needs a lot more work to get it so some sort of straightness:
Image

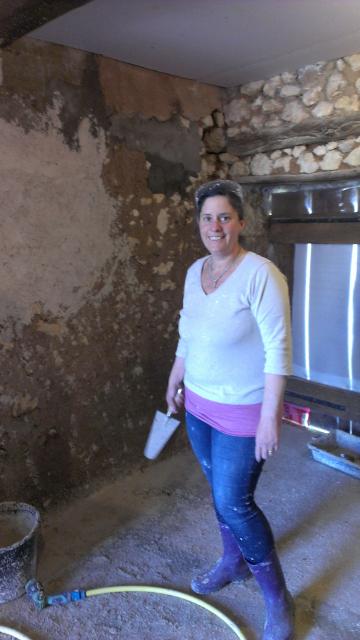
Me exhausted and covered in lime splatters at the end of the rendering day!
Image

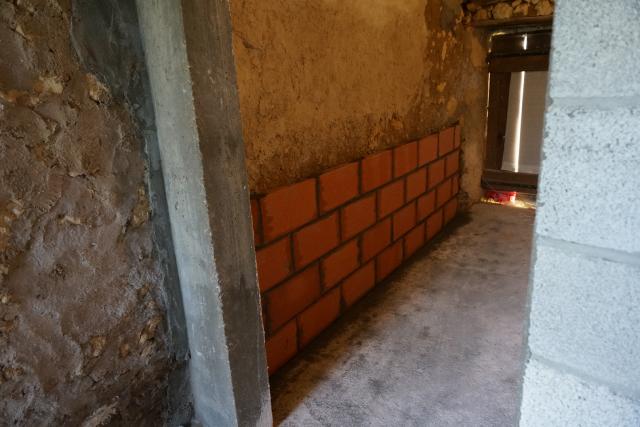
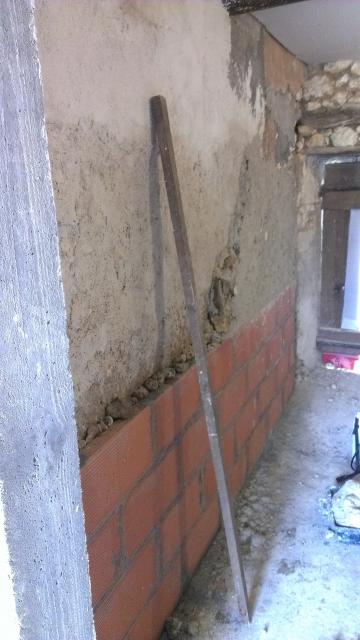
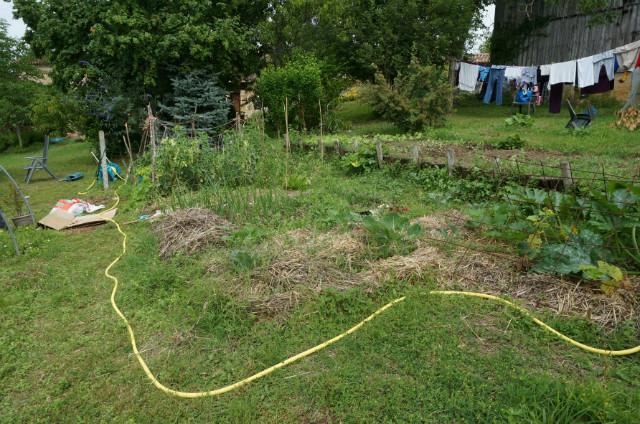
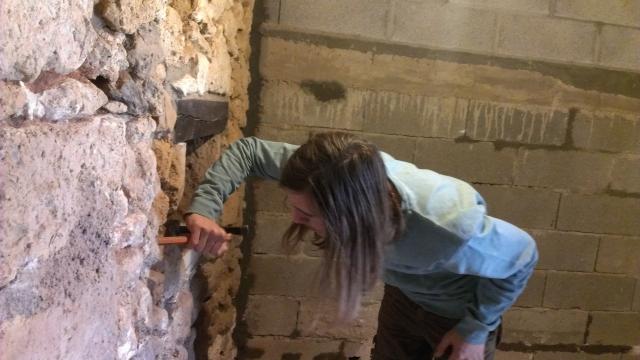
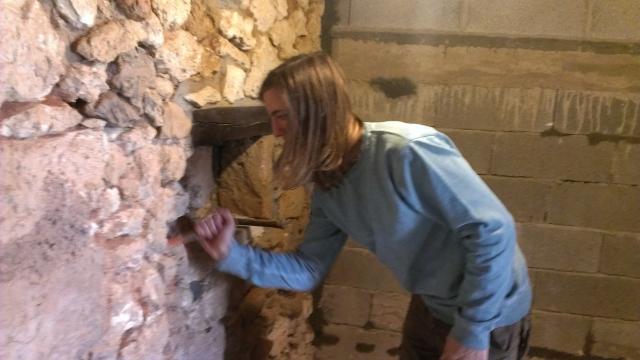
The next couple of days we worked on it was all about the wonky wall. The original plan was to build a terracotta wall on the bottom half with a little shelf on it to straighten it but there was a change of plan with the teracotta wall as he was able to get it in much closer than we hoped by only doing 4 blocks high which meant he could then build up the wonky wall to meet the new straight wall in a much gentler more organic looking way. We don’t want straight walls – we want it to have character! I’m quite pleased as while I do like the odd shelf they do collect clutter! It took ages and Josh and I ran around finding stones of the right size and shape in the garden in the various rock piles!
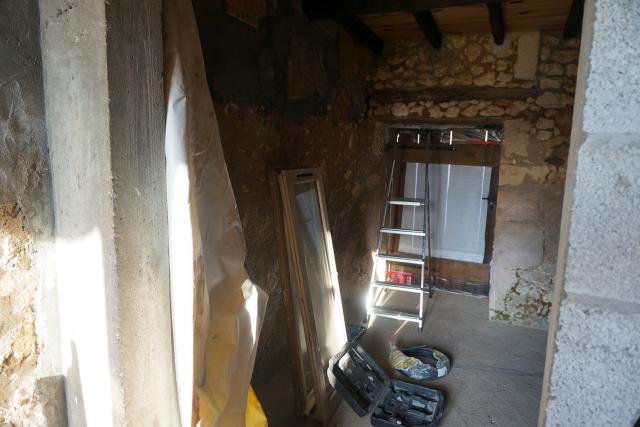
This is the wall after the wall was built but before we started:
Image
And the gradual working along.
Image

As you can see it is giving us a very natural look by using stones and lime original building material but still a reasonably straight wall that can have pictures / shelves hung on it when we are done!
Image

Image
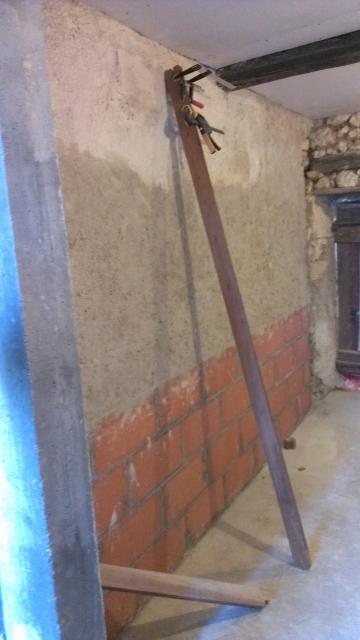
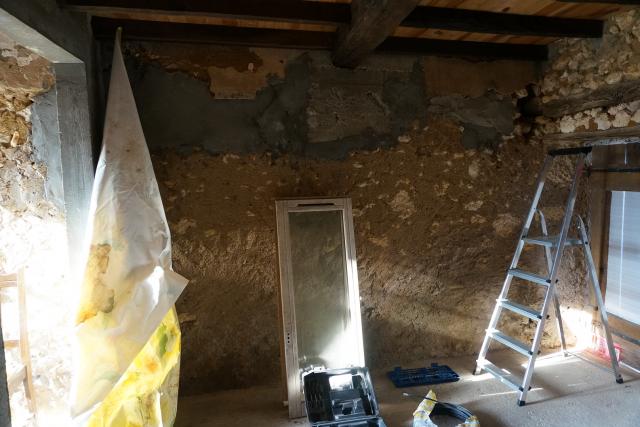
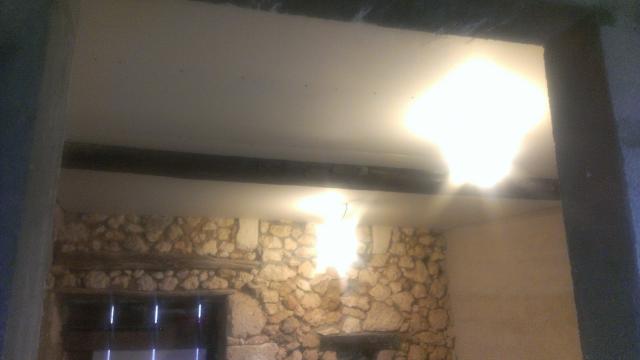
The completed building up of the wonky wall (and you can see the top left stone by the door where he has started cleaning off the old mortar from the nice cut stones!). Now the room is ready for the first all over coat of lime (it still needs to dry more anyway) then we’ll finish off all the room in a single coat once the door and window are in so it is all smooth and meets up. It means we’ve had to live with it at this stage the last month or so while MIL has been in there but it is now super hard ready to take the next layer.

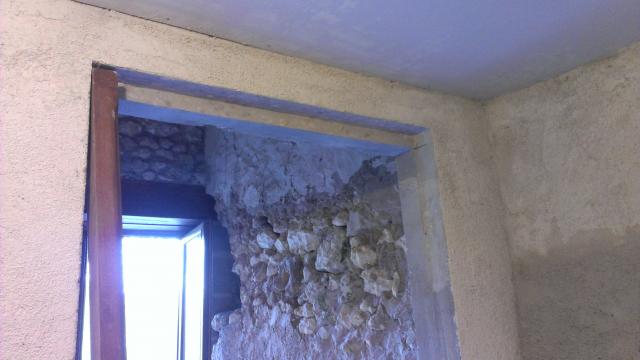
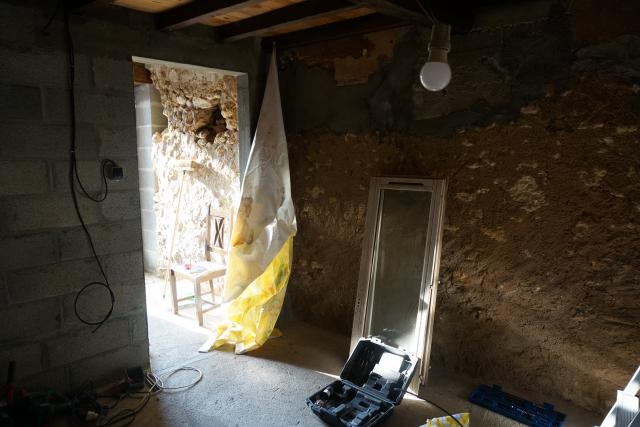
The next job once that was done was to cut out the frame where the door is being fitted – it looked like it was straight and we hoped not much would have to be done but whoever built it forgot to use a spirit level and hubby had to cut out quite a lot of the very hard cement – the dust was horrific – 6 weeks after the job was done I still keep finding it! I sealed it as best I could with an old plastic table cloth and tape but it kept coming open and filling the house with dust. I added wood and a broom which helped it work much better!
Image

Here is what J had to cut out with the angle grinder, it was supposed to be ‘just’ a 3cm block off the top as the door is slightly higher than the opening, that was fine, went quite quickly and we didn’t get too much of a mess:
Image
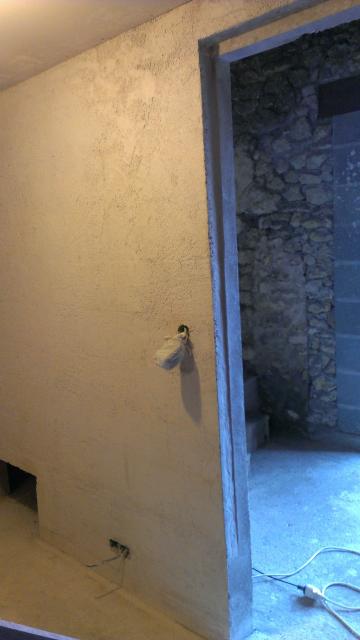
Then when J went to put the wooden frame in in discovered that the sides were not straight so he had to cut out a not inconsiderable bit almost to the floor. This is when the dust really got everywhere as it was a bit wider so it was blowing more and the kids left both the kitchen door and the bedroom door open at various points (what were they thinking ) so we had about an hour just clearing up to bearable.
Image

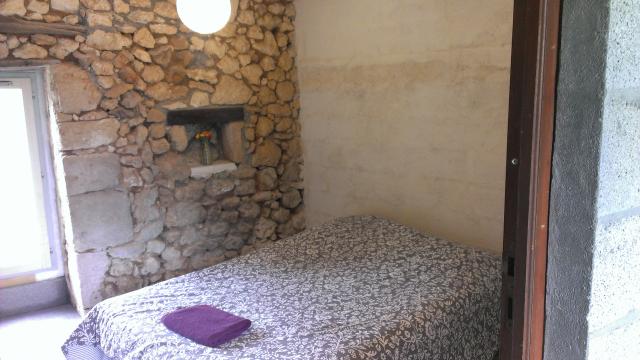
The next day it all was worth it when I came home to find this:

Image

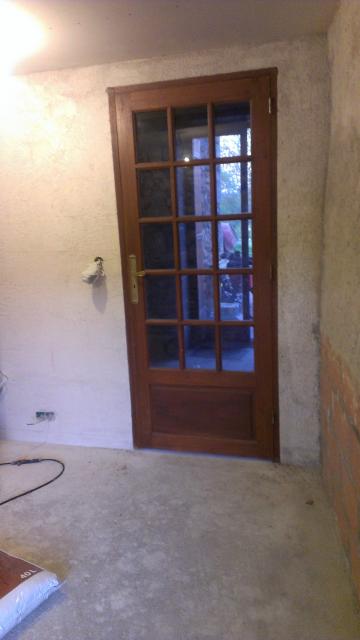
It has a door so it must be a room now!

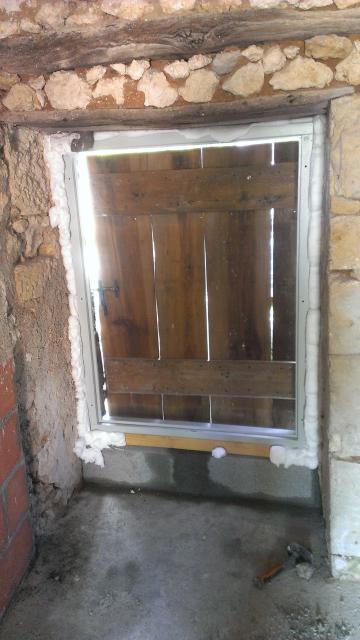
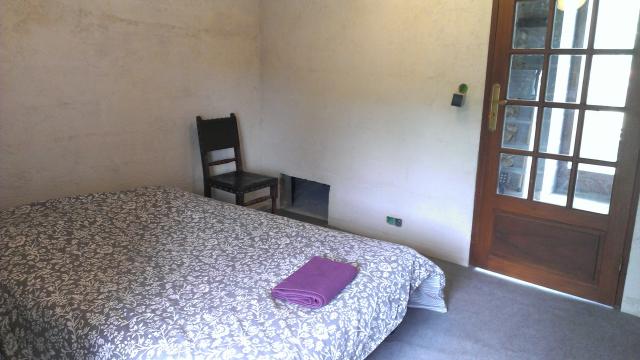
The barn door type opening at the front was refitted by himself so that instead of opening inwards like a door it now opens outwards like a shutter. This meant we could install a window finally – it still needs painting finished and fascia / render over the breezeblock / foam but the excitement of having a window can’t be underestimated! We were so lucky to find a preloved window that fitted in this very strange shaped hole for a window as otherwise we would have needed to get a custom made one made.

Image

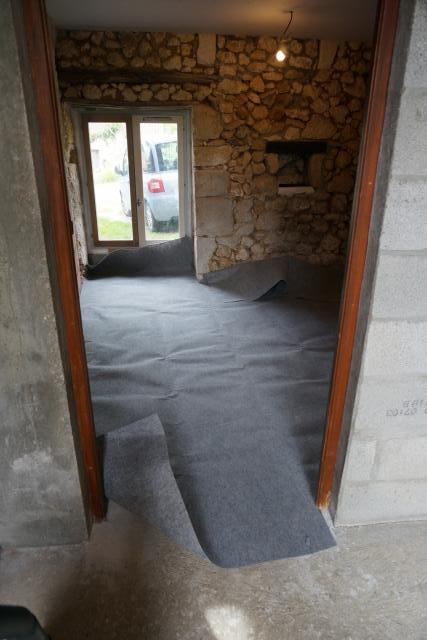
And the (not) carpet going in so there is a clean floor not just concrete until we tile!
Image

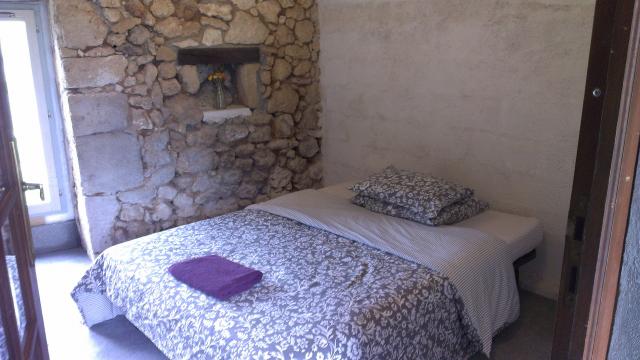
And ta da – minutes before himself came back from the airport with my mother in law I’d finished cleaning and making up the room. I think it looks pretty good considering it is only 1/2 finished and still needs the window painting, further coats of lime render and the ceiling joints doing and painting and the stone wall pointing!

Image Image Image


Office / guestroom renovation – part 1

We have been working on this room the last month or two (between gardening, knotweed duty, visitors, illness, car fixing etc!). It is exciting as it is the first room we have been able to get stuck into, until now there have been a lot of little jobs (new windows, insulation things like that!).

Some before shots, this one shows the door going out into the entry area where you come in from the garden:

Image

And looking the other way – the old barn door goes out to the front of the house. We have spoken to our neighbour whos family owned the barn and it used to be where his grandmother kept her chickens! We are going to try to keep the old door as a shutter to go over the double glazed window that we managed to source that fits into the odd sized opening! The front wall stones will be left exposed and pointed:

Image

Electricity starting to be run:

Image

Image

This is only a temporary works light switch just in case you were wondering why we had such strange taste!

Image

Image

It is quite hard to see but this wall is massively bowed so there will be a terracotta brick wall built at the bottom to help even it all out – the bonus with these is that they are breathable – really important in old stone buildings. For the same reason we are doing lime render on all the walls (including the breezeblock walls which were already there).

Image

It has a little damp on one side as well and had a bit of a musty (possibly animal?) smell, particularly when it is cold and damp. I read that enzymatic cleaners are good for smells in old plaster etc and we didn’t have any of that (not even sure what it is) but we figured washing powder has enzymes in it so we ended up mixing a strong dose of washing powder and water and spraying it on the walls, they came up really clean and smelling lovely! So there is a good tip if you have smelly old barn walls in your barn renovation that you want to get smelling nice 😉 .

More shots of the electricity going in:

Image

Image

and Josh starting to clean off the stones on the nice wall:

Image

Image

Time for the insulation to go up (horrid stuff – wish we could afford to do it with wool or wood insulation!):

Image

I wish we’d done this months ago as our room is above this and we would have been so much warmer in the winter!

Image

And the plasterboard goes up!

Image
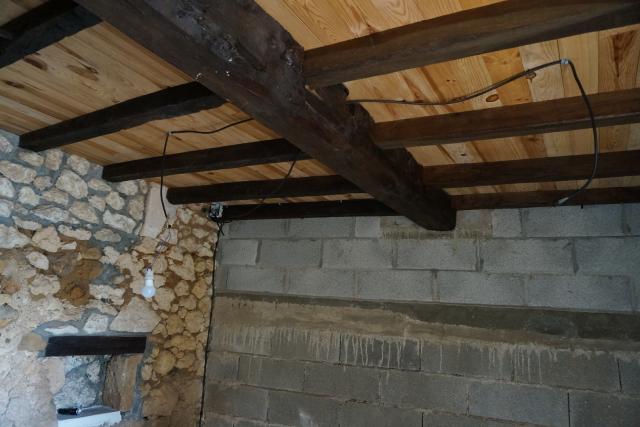
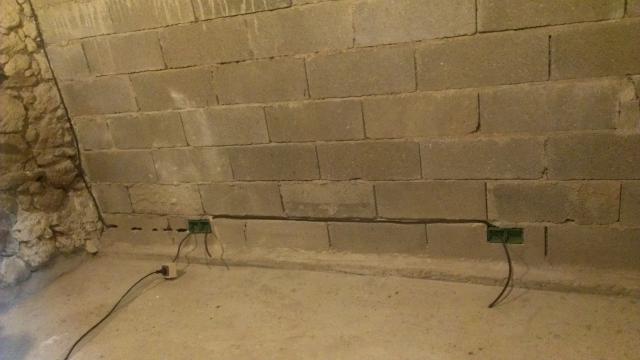
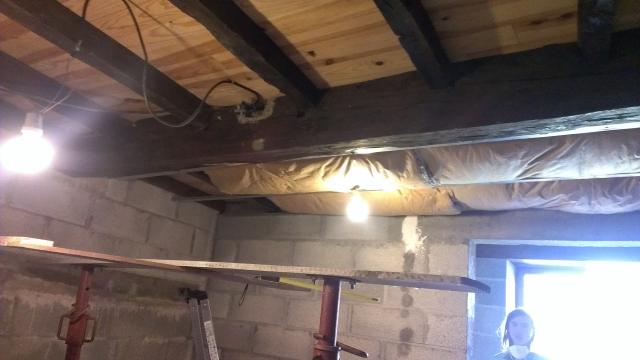
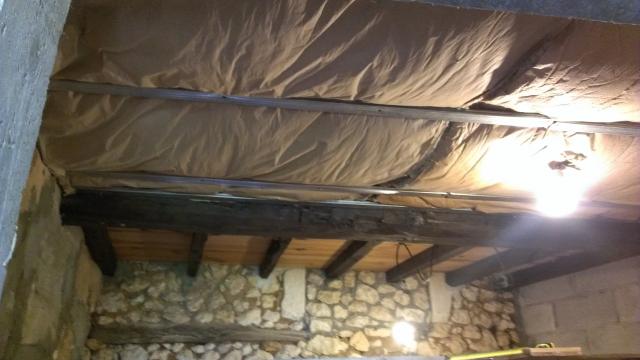
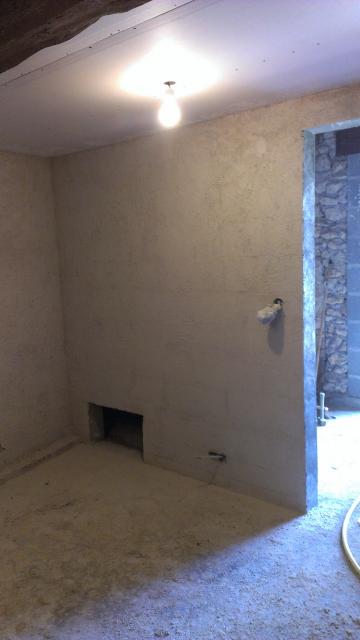
We are wanting to use traditional building materials where we can like the lime render and don’t want to use plasterboard anywhere if we can help it. Unfortunately for ceilings there isn’t a lot of choice if we want good insulation to go up so plasterboard it is!